\GenHow to install / Setup Twlight — Twitter clone social networking app Android studio + Firebase +…
How to Setup Twlight social networking app — Twitter clone — Documentation
Buy Twlight social networking app — Twitter clone for android platform in $43 .
Get Started
Please read the documentation carefully , and if you have any question contact us. You can also watch some videos on step by step guide to setup Twlight, documentation fully explained.
Requirements
You don’t need any Web hosting or domain. Things required are :-
- Android Studio
- Firebase account
- Agora account
Android Configuration
In order to start configuring , you need to install Android studio and the ‘Java SE Development Kit’. First download the android studio from here Android Studio
Importing Android Project
To import the template, simply open Android Studio and import/open the template. Make sure to wait for all the processes (the Gradle Build) to complete before continuing to the next step
Addition steps
Addition steps Sometimes, the Gradle Build fails. In some cases additional components are needed, Android Studio will ask you to do download these additional SDK components in the ‘messages’ tab, simply follow the instructions provided to install and download the additional components.
Change Bundle ID
Change App Name
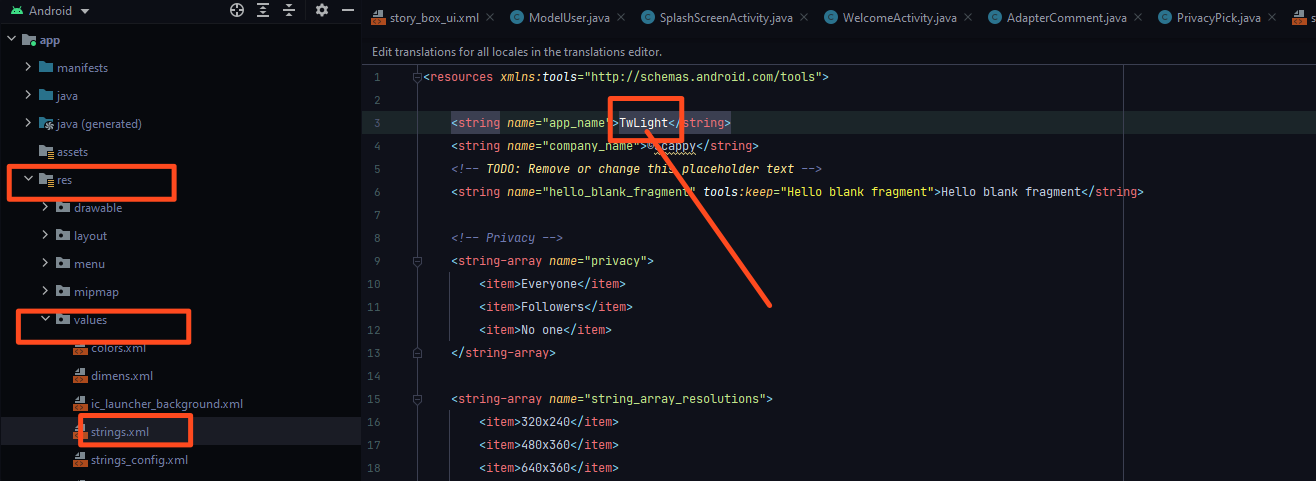
Above is illustrated how you can change the name of the application.
Change Color Scheme
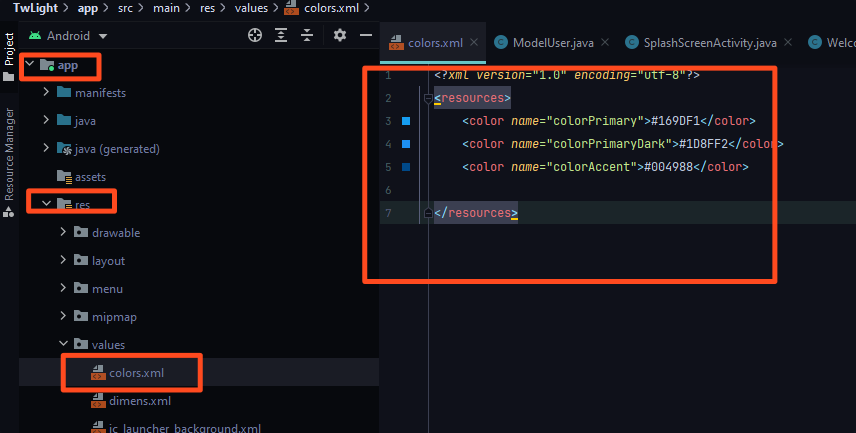
Above is illustrated how you can change the Colors of the application.
Change App icon -
Now we need to put a png file with your icon named ‘ic_launcher.png’ in the following folders:
- res/drawable-mdpi — with a size of 48px x 48px
- res/drawable-hdpi — with a size of 72px x 72px
- res/drawable-xhdpi — with a size of 96px x 96px
- res/drawable-xxhdpi — with a size of 144px x 144px
this URL will help you resize your images or event create new icon to your app Launcher Icon Generator
Above is illustrated how you can change the icon of the application.
Firebase Configuring
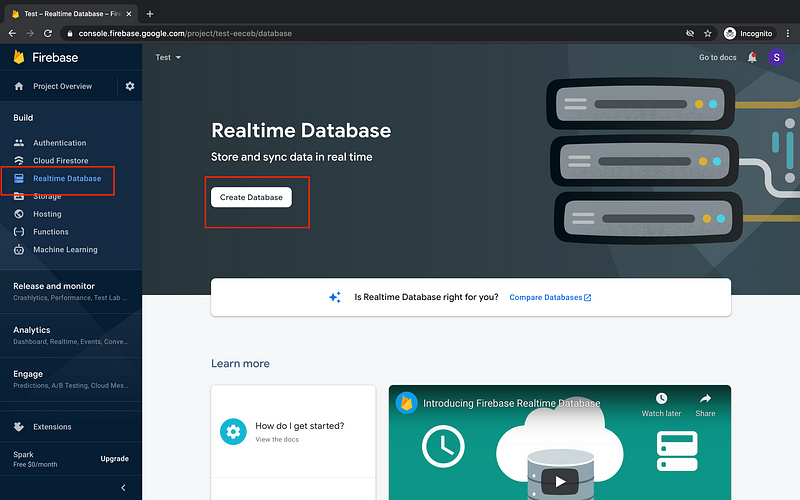
Create Realtime Database
Go to Database and create realtime database.
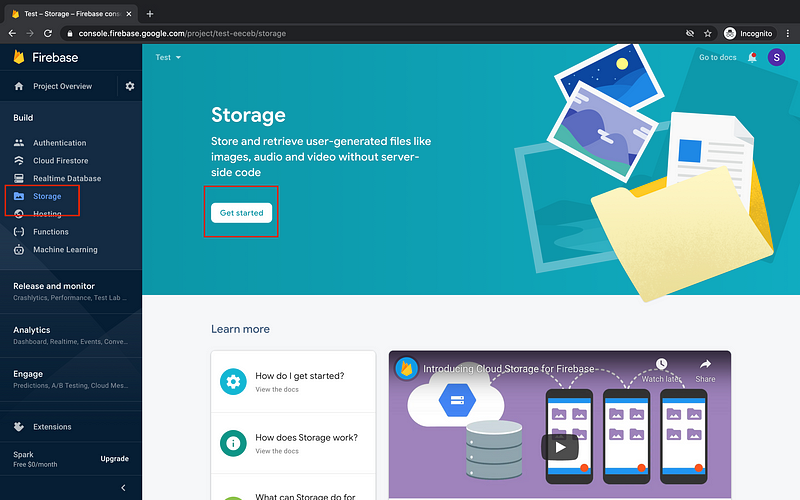
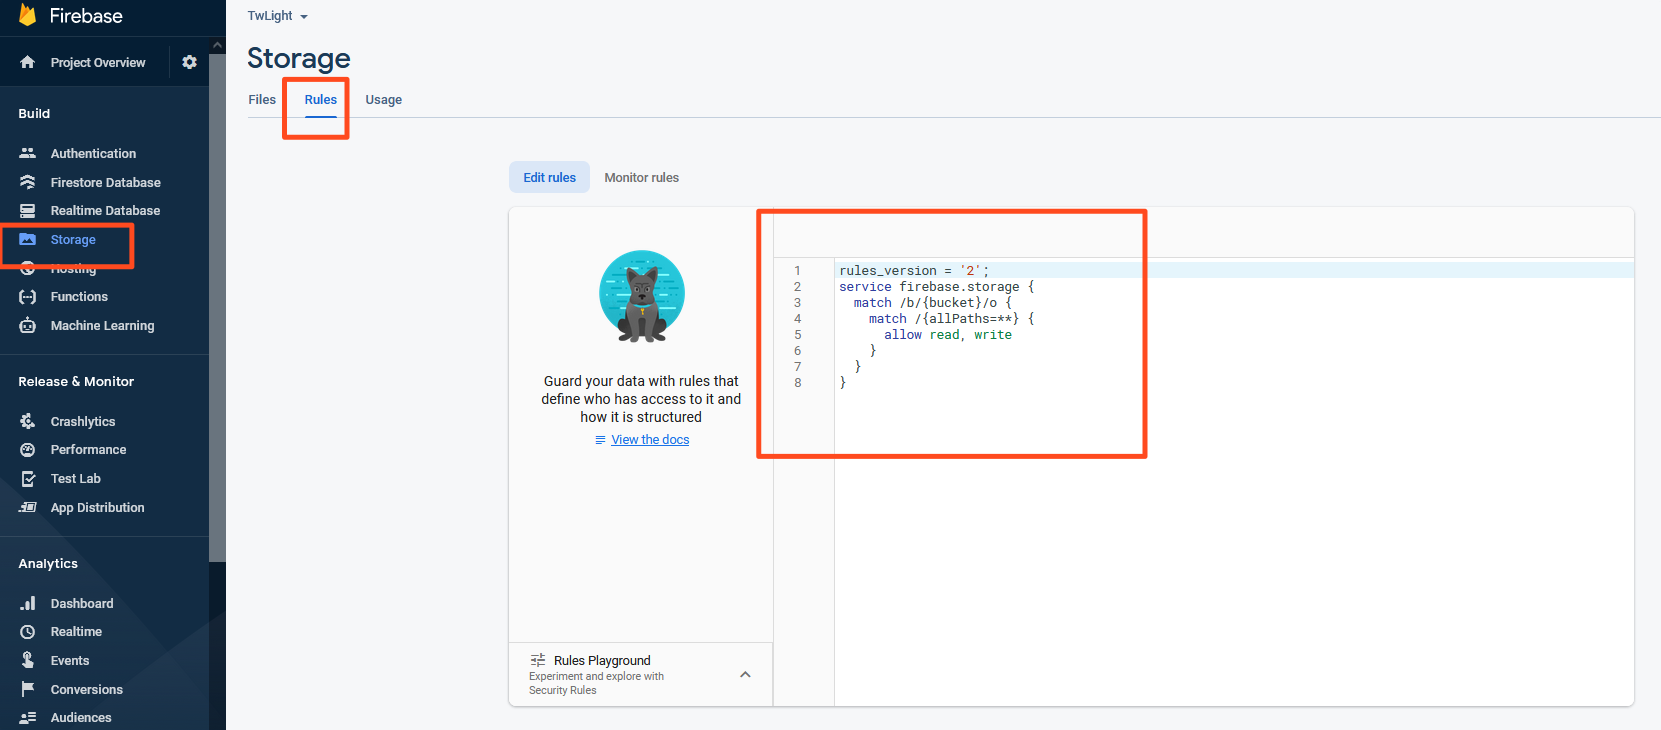
Create Storage
Go to storage and create a new storage.
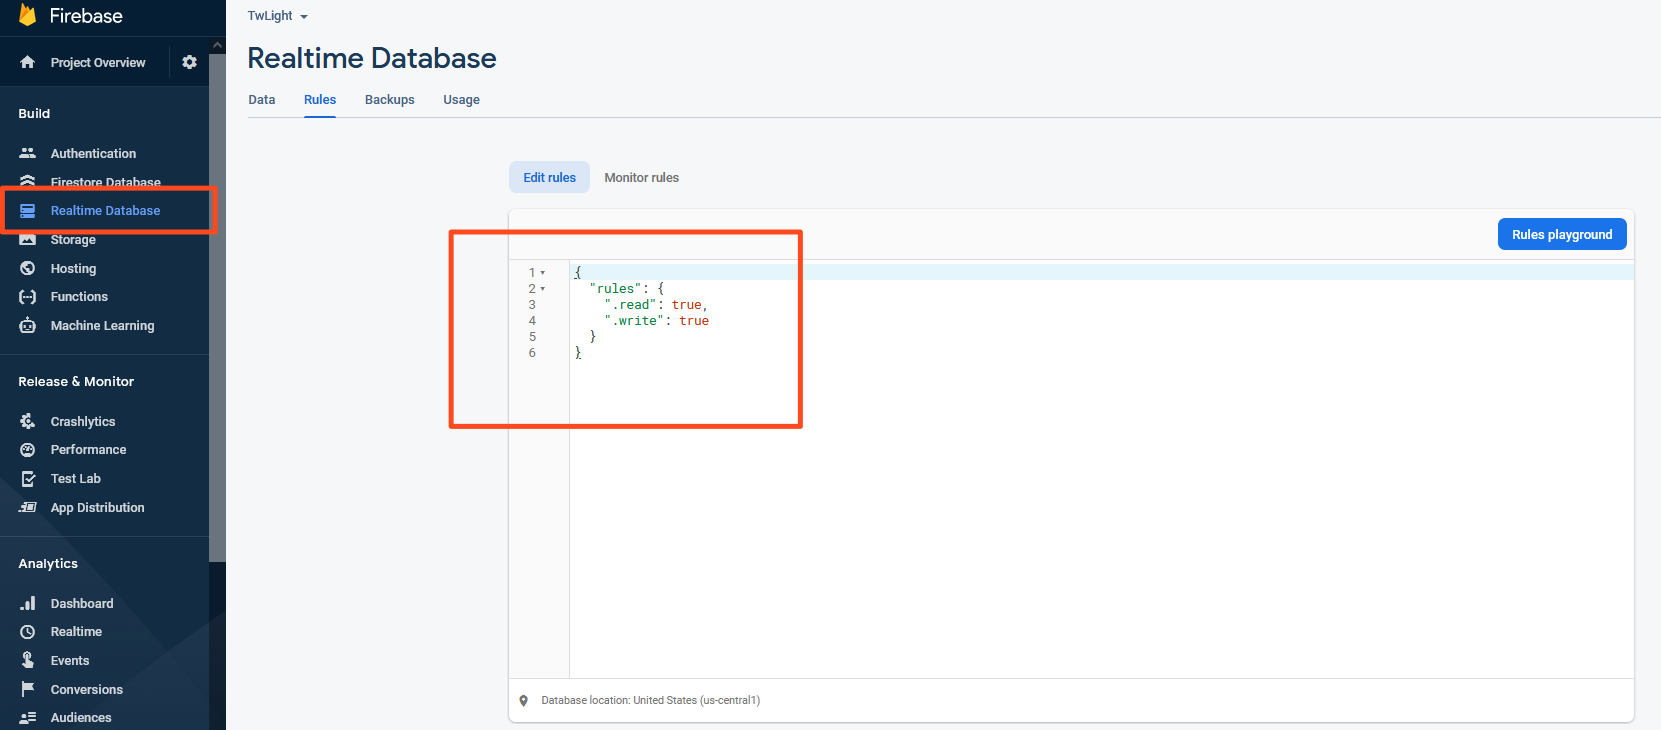
Change Firebase Db Rules
if you did not change the firebase rules the app functions will not work.
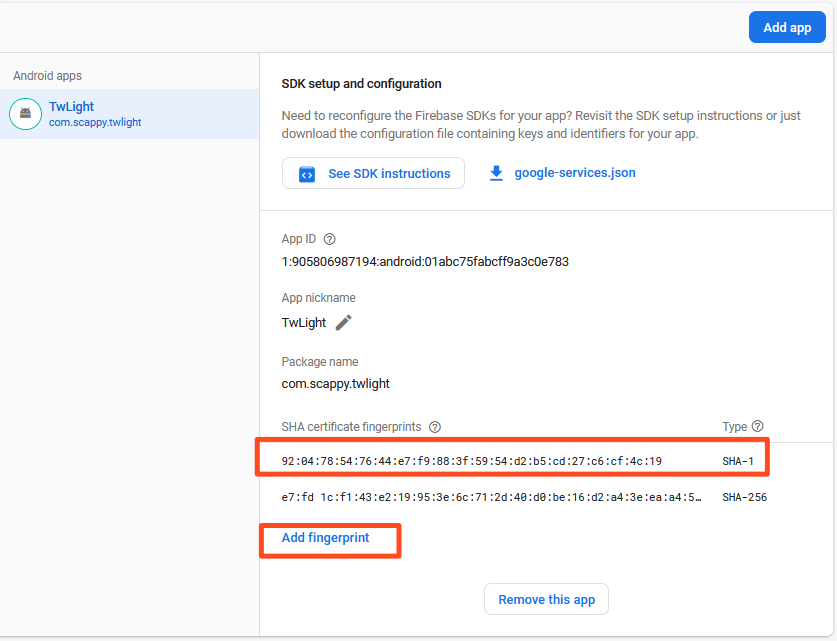
Generate SHA-1
go to termianl as in the photo and use the command :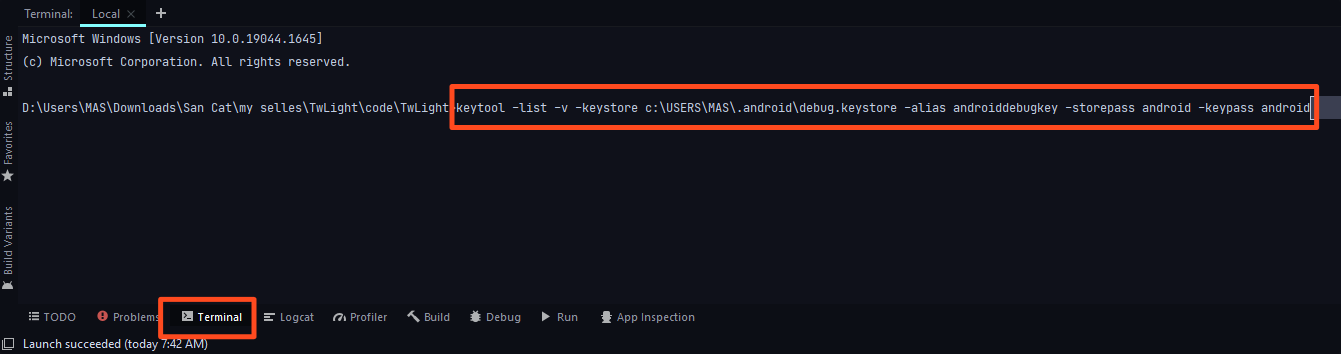
keytool
                -list -v -keystore c:\USERS\MAS\.android\debug.keystore -alias
                androiddebugkey -storepass android -keypass android
Now
                press enter and get your sha-1 and copy & past it on
                firebase :)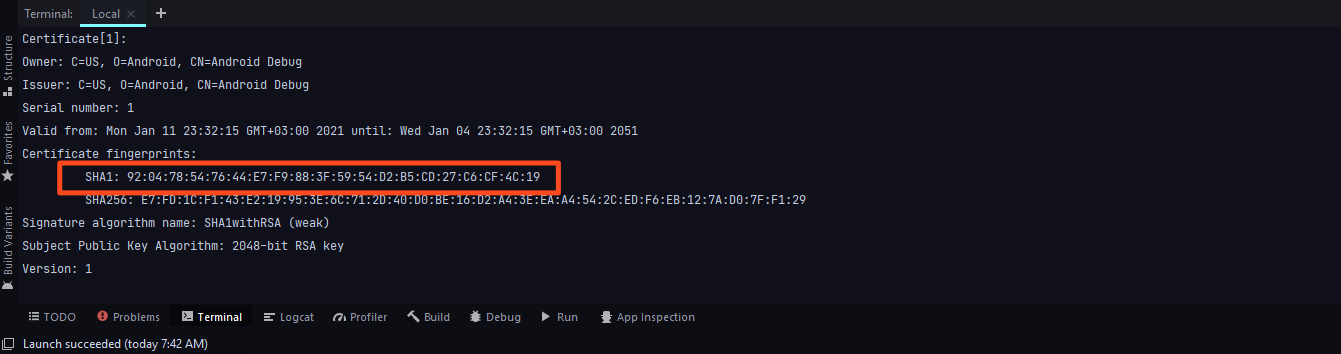
Now lets
                active login method follo the image
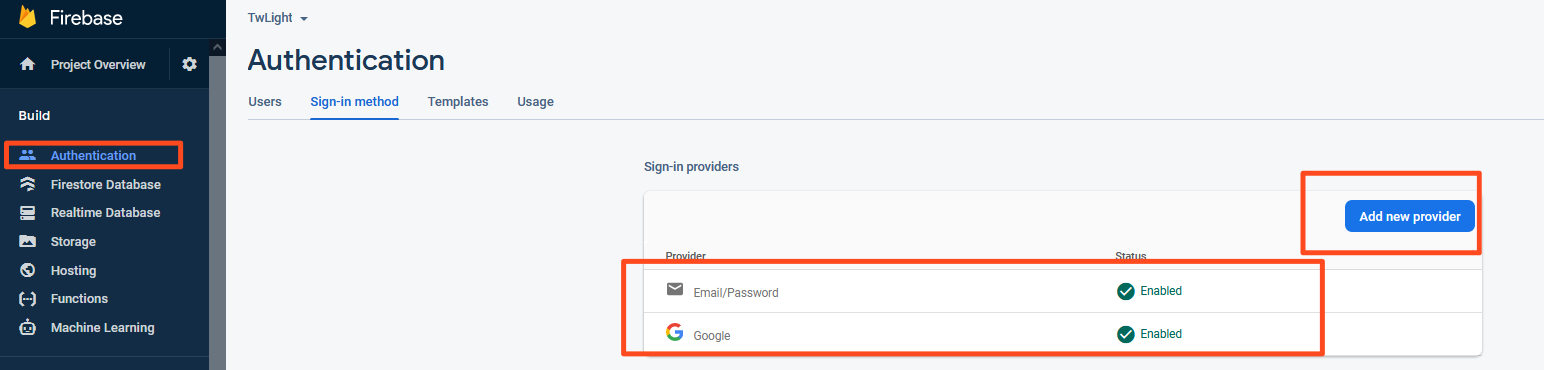 First go to
"Authentication" then go to "Add new
First go to
                "Authentication"  then go to "Add new
provider"
please enable
                        Email/Password


                Google
Key for notifications
first we need to get the key from our firebase project to do that follow the image :
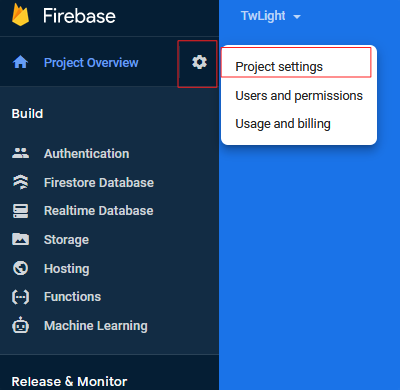
select the project and then go to "Project settings"

Then go to "Cloud Messaging"
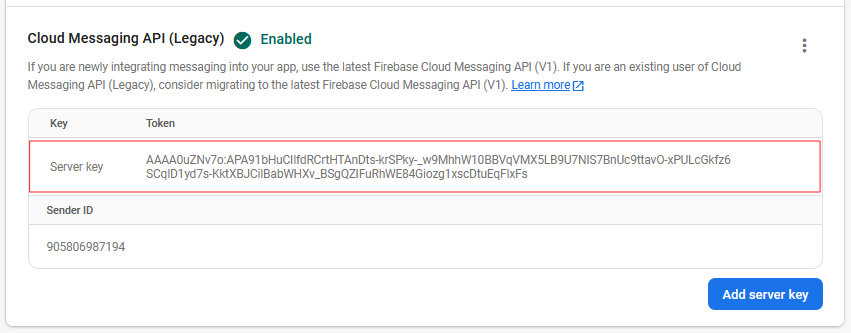

Now be careful here : please copy the old key_code(start from "AAAA") after (key="key_code") and click at (Ctrl + SHIFT + R)
it will open new search window as the following:
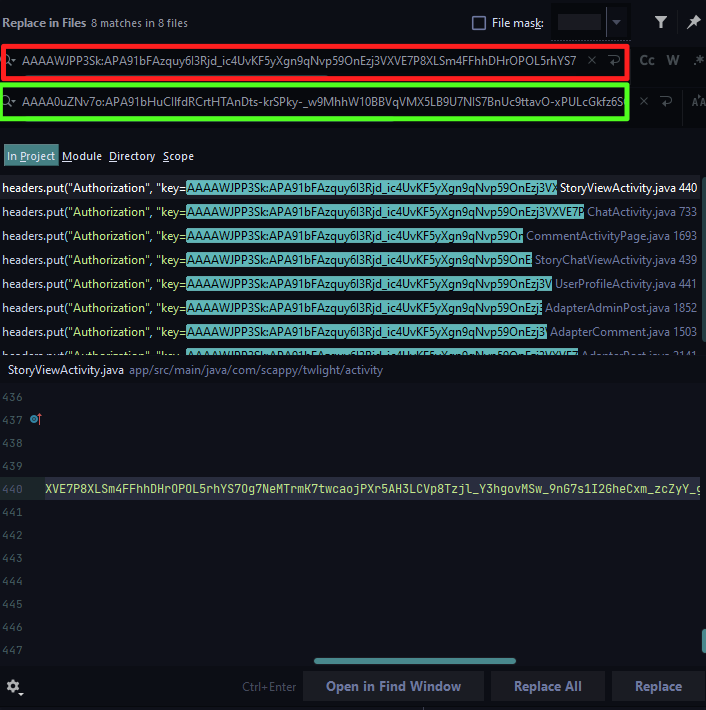
Here please pest the old key in the red box as the photo and past our new key in green box as in the photo up ! , then click replace all. done !
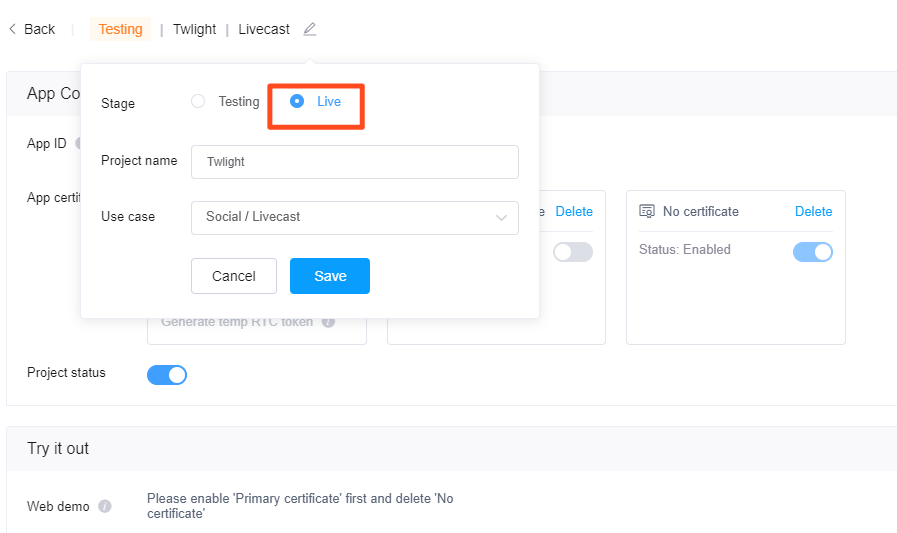
Set up live streaming
At first, you must have an Agora account. After creating your account, follow these steps: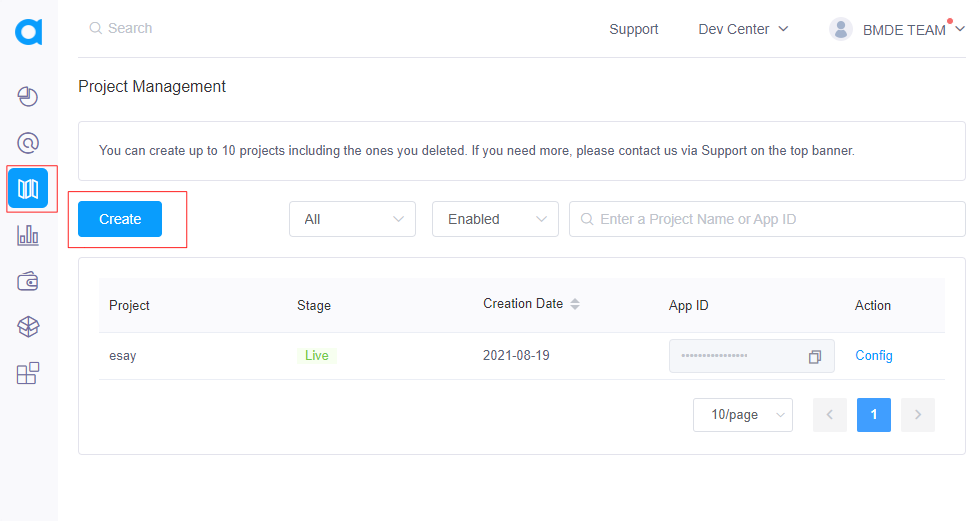
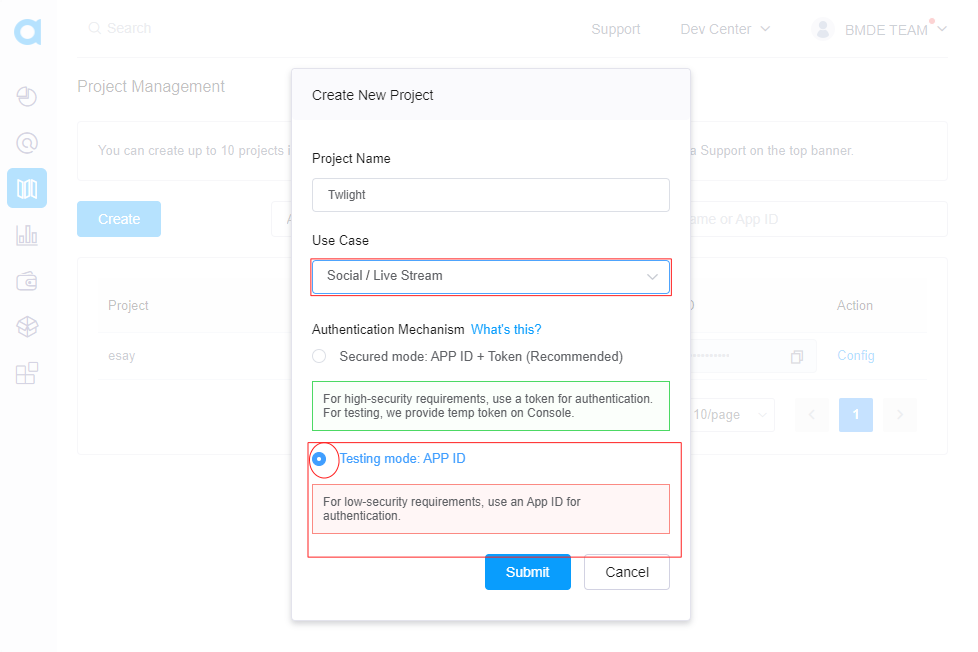
Please pay attention, please make it in Test Mode temporarily.
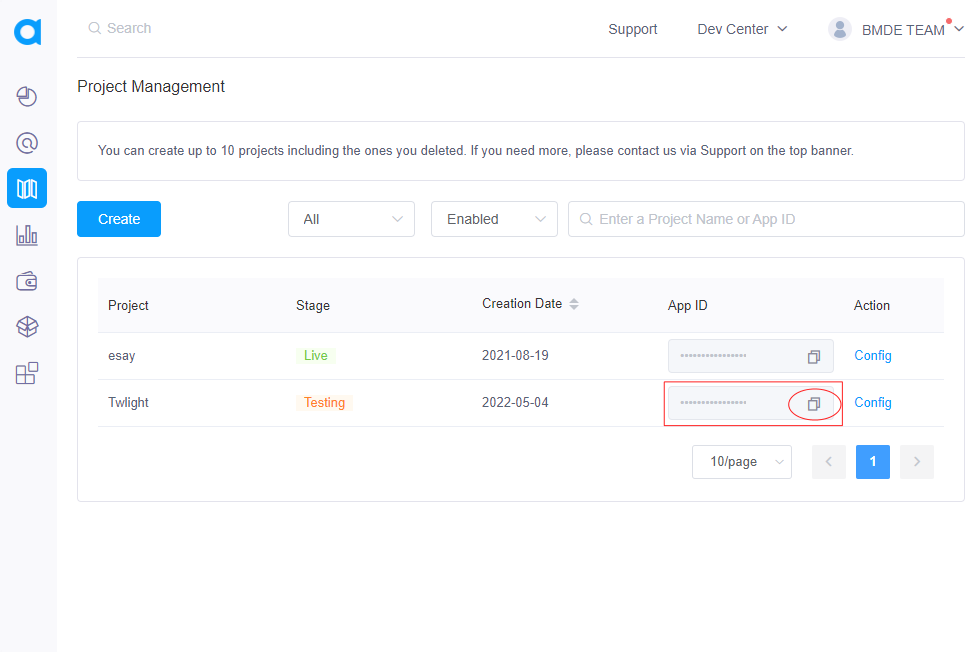

 Now We need to make our
agora app live so click on "Config" as the photo up .
Now We need to make our
agora app live so click on "Config" as the photo up .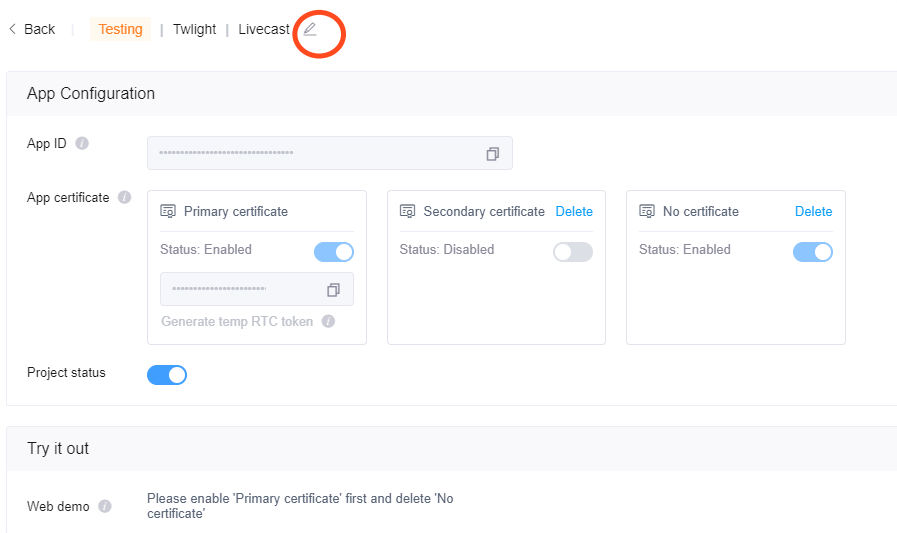
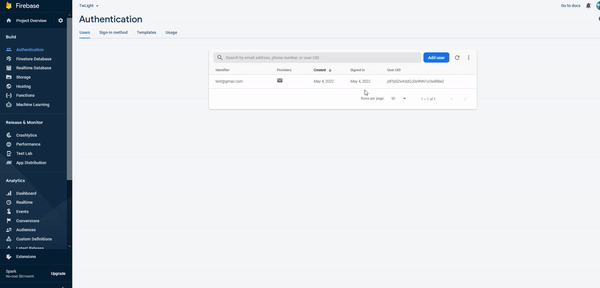
Activate the admin, and make any user admin.
This step is very important and may cause an error in the application if you ignore it, follow all the steps above, run your application and create your account, then go to the firebase
Go to "Authentication" and you will find that there is a good
account (that you created) and now let's make this account
addictive!
follow what we did in the simple video below:
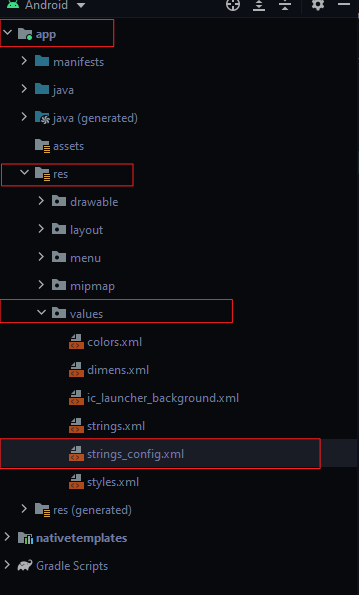
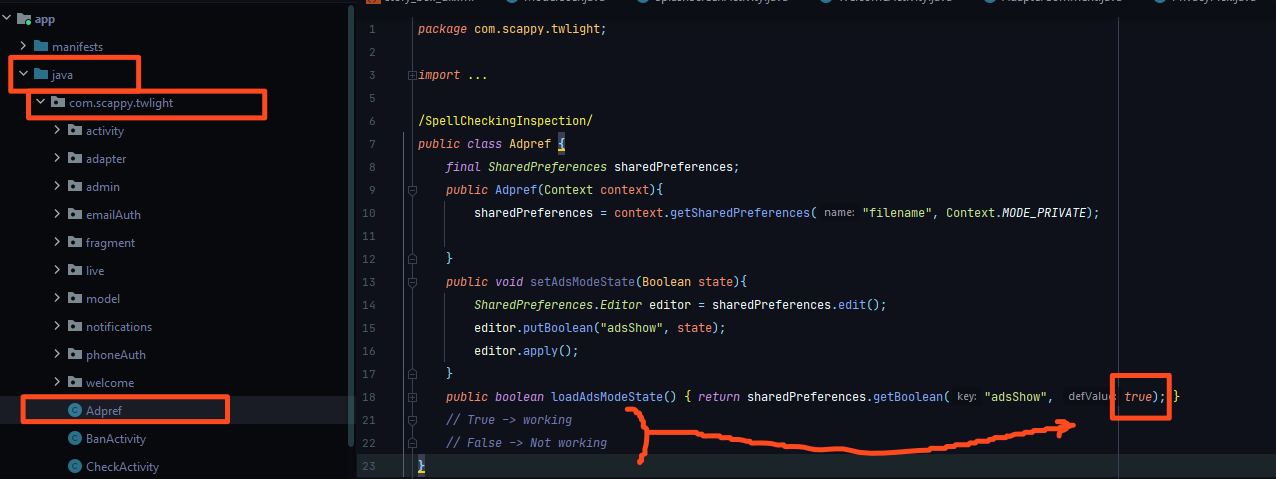
To activate ads from Google Admod, create an account in Google Admod and then register your application, then create a native ad unit and banner ad unit, you will get an ID for both of them, copy it and go to the path in the image and paste them
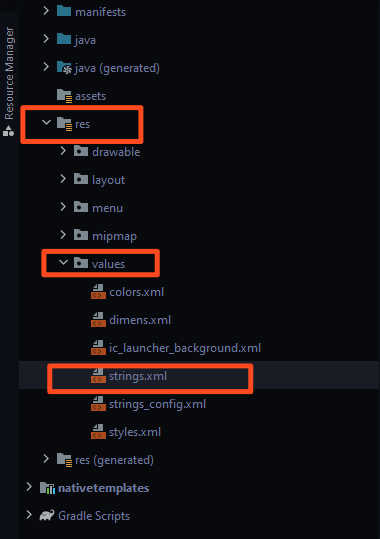

If you want to hide ads or not use them, please deactivate them as in the picture below
Any query ?
If you have any query mail us on scappy@bmde-labs.com@gmail.com or comment in product page.